This is an old revision of the document!
Table of Contents
Setup Tracking Suit
Suit
Use the tracking suits ONLY with the black cotton-bodies underneath. It is the users responsibility to wash the bodies and bring them back in a timely manner.
- Choose a suitable suit size for the actor.
- Take off all the markers that are still on the suit.
- Make sure the suit fits tight and the top and pants cannot shift (use velcro between jacket an pants)
- Put on shoes and gloves
Marker Placement
Inside Motive, go to Menu > Layout > Create.
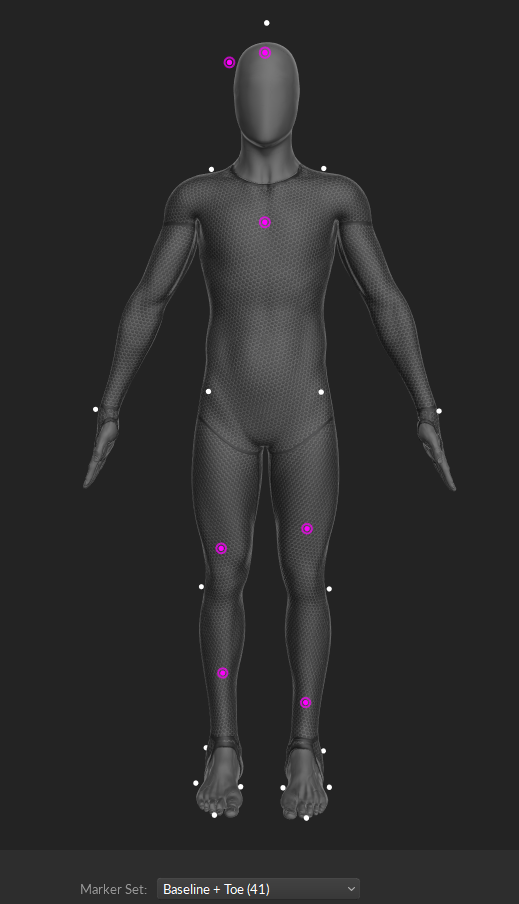
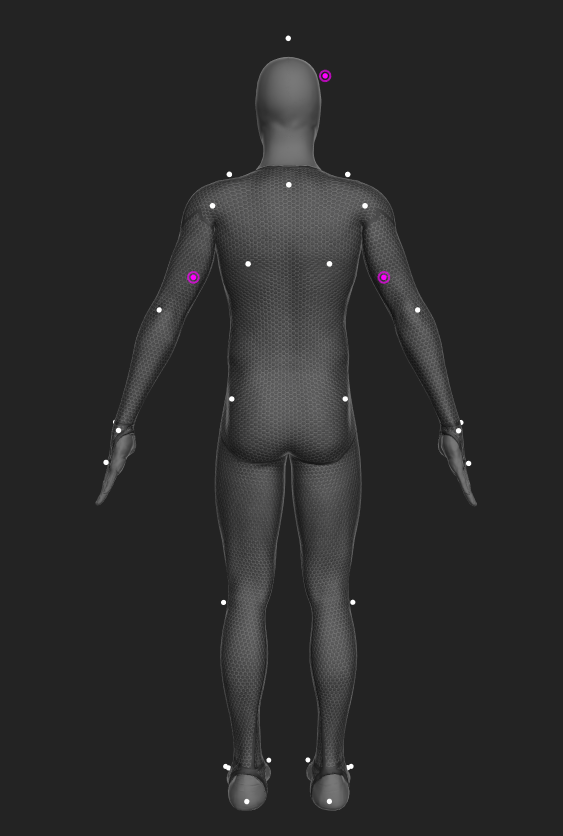
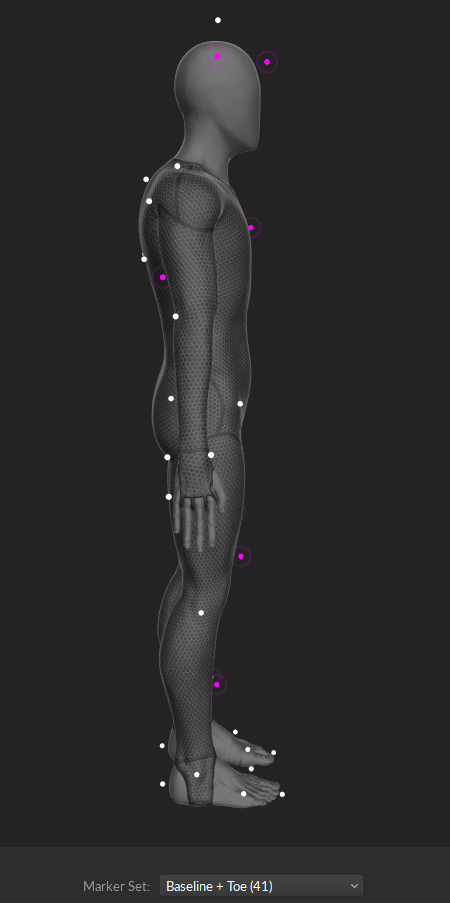
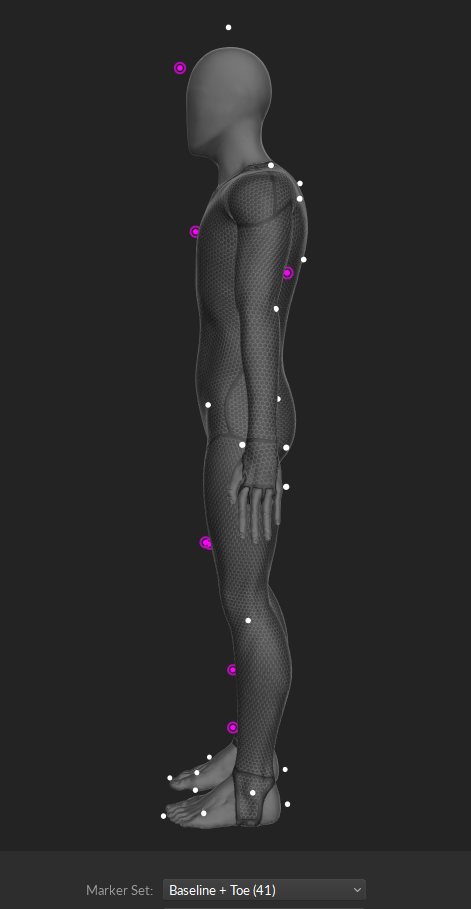
There are different marker sets (marker placements) for different use cases (with or without finger tracking). Attach the markers according the 3D character.
Take care at the placement of the white makrers at the joints. set the markers in such a way, that the marker defines the axis of the joint and doesn't move when the joint is used (ankle, knee, shoulder, elbow).
The purple markers are on bones and should be placed accordingly but can be vary a bit in exact position.
Markerset BaseLine + Hinged Toe (41 Markers)
- feet: 5 (x 2)
- legs: 3 (x 2)
- hips: 4 (2 front - 2 back)
- back: 3 (triangle)
- shoulder: 2 (x 2)
- chest: 1
- arm: 2 (x 2)
- hands: 3 (x 2)
- head: 3
Markerset BaseLine + Hinged Toe (41 Markers)
attach the markers according the model. take care at the joints. set the markers in such a way, that the marker defines the axis of the joint and doesn't move when the joint is used. (ankle, knee, shoulder, elbow.)
let the actor stand in the center of the space and take the T-pose.
the system should detect now all the 41 markers.
give it a name and press create.
If everthing went right, the virtuall character should appear inside perpective view. make sure the settings allow the display of the skeletons:
adjust manually each bodypart if they appear to be off.


