Table of Contents
Elena Hohl
Autumn semester 2017
The focus of my practice this semester is on experimenting with the jute canvas and other unconventional fabrics or fibers as a support for painting and printing.
The materials used for the process of making and the method are conventional such as the sizing, the stretching and the act of painting. However the origin of support is unlikely in conventional painting.
Please write your comments in the comment section below.
Jute canvas experimentation 1
Introduction
The canvas is composed by 3 pieces of 100 x 150 cm with a fringe border of roughly 5 cm. Sewed together they are approximately 270 x160 cm. This piece is one big experiment in itself.
The jute plant thrives in hot and humid climates, such as in India and in the African continent. Jute canvas is popular for its use for transportation in international trading of goods. Its trade first started in the 1750s. When the English East Indian Companies sent samples Jute which they used to call ‘Indian Grass’ to England. In the 1838 Jute sacks had their first commercial breakthrough used for coffee transportation to the Netherland and only in the 1850s they set up the first mills in Kolkata. By the 1870s Jute became the preferred material for transportation of goods because of its cheap price and resistant quality. In the 1950s an artificial synthetic fabric called jute geotextile was created to use in construction and in landscape architecture (Sanyal, 2017).
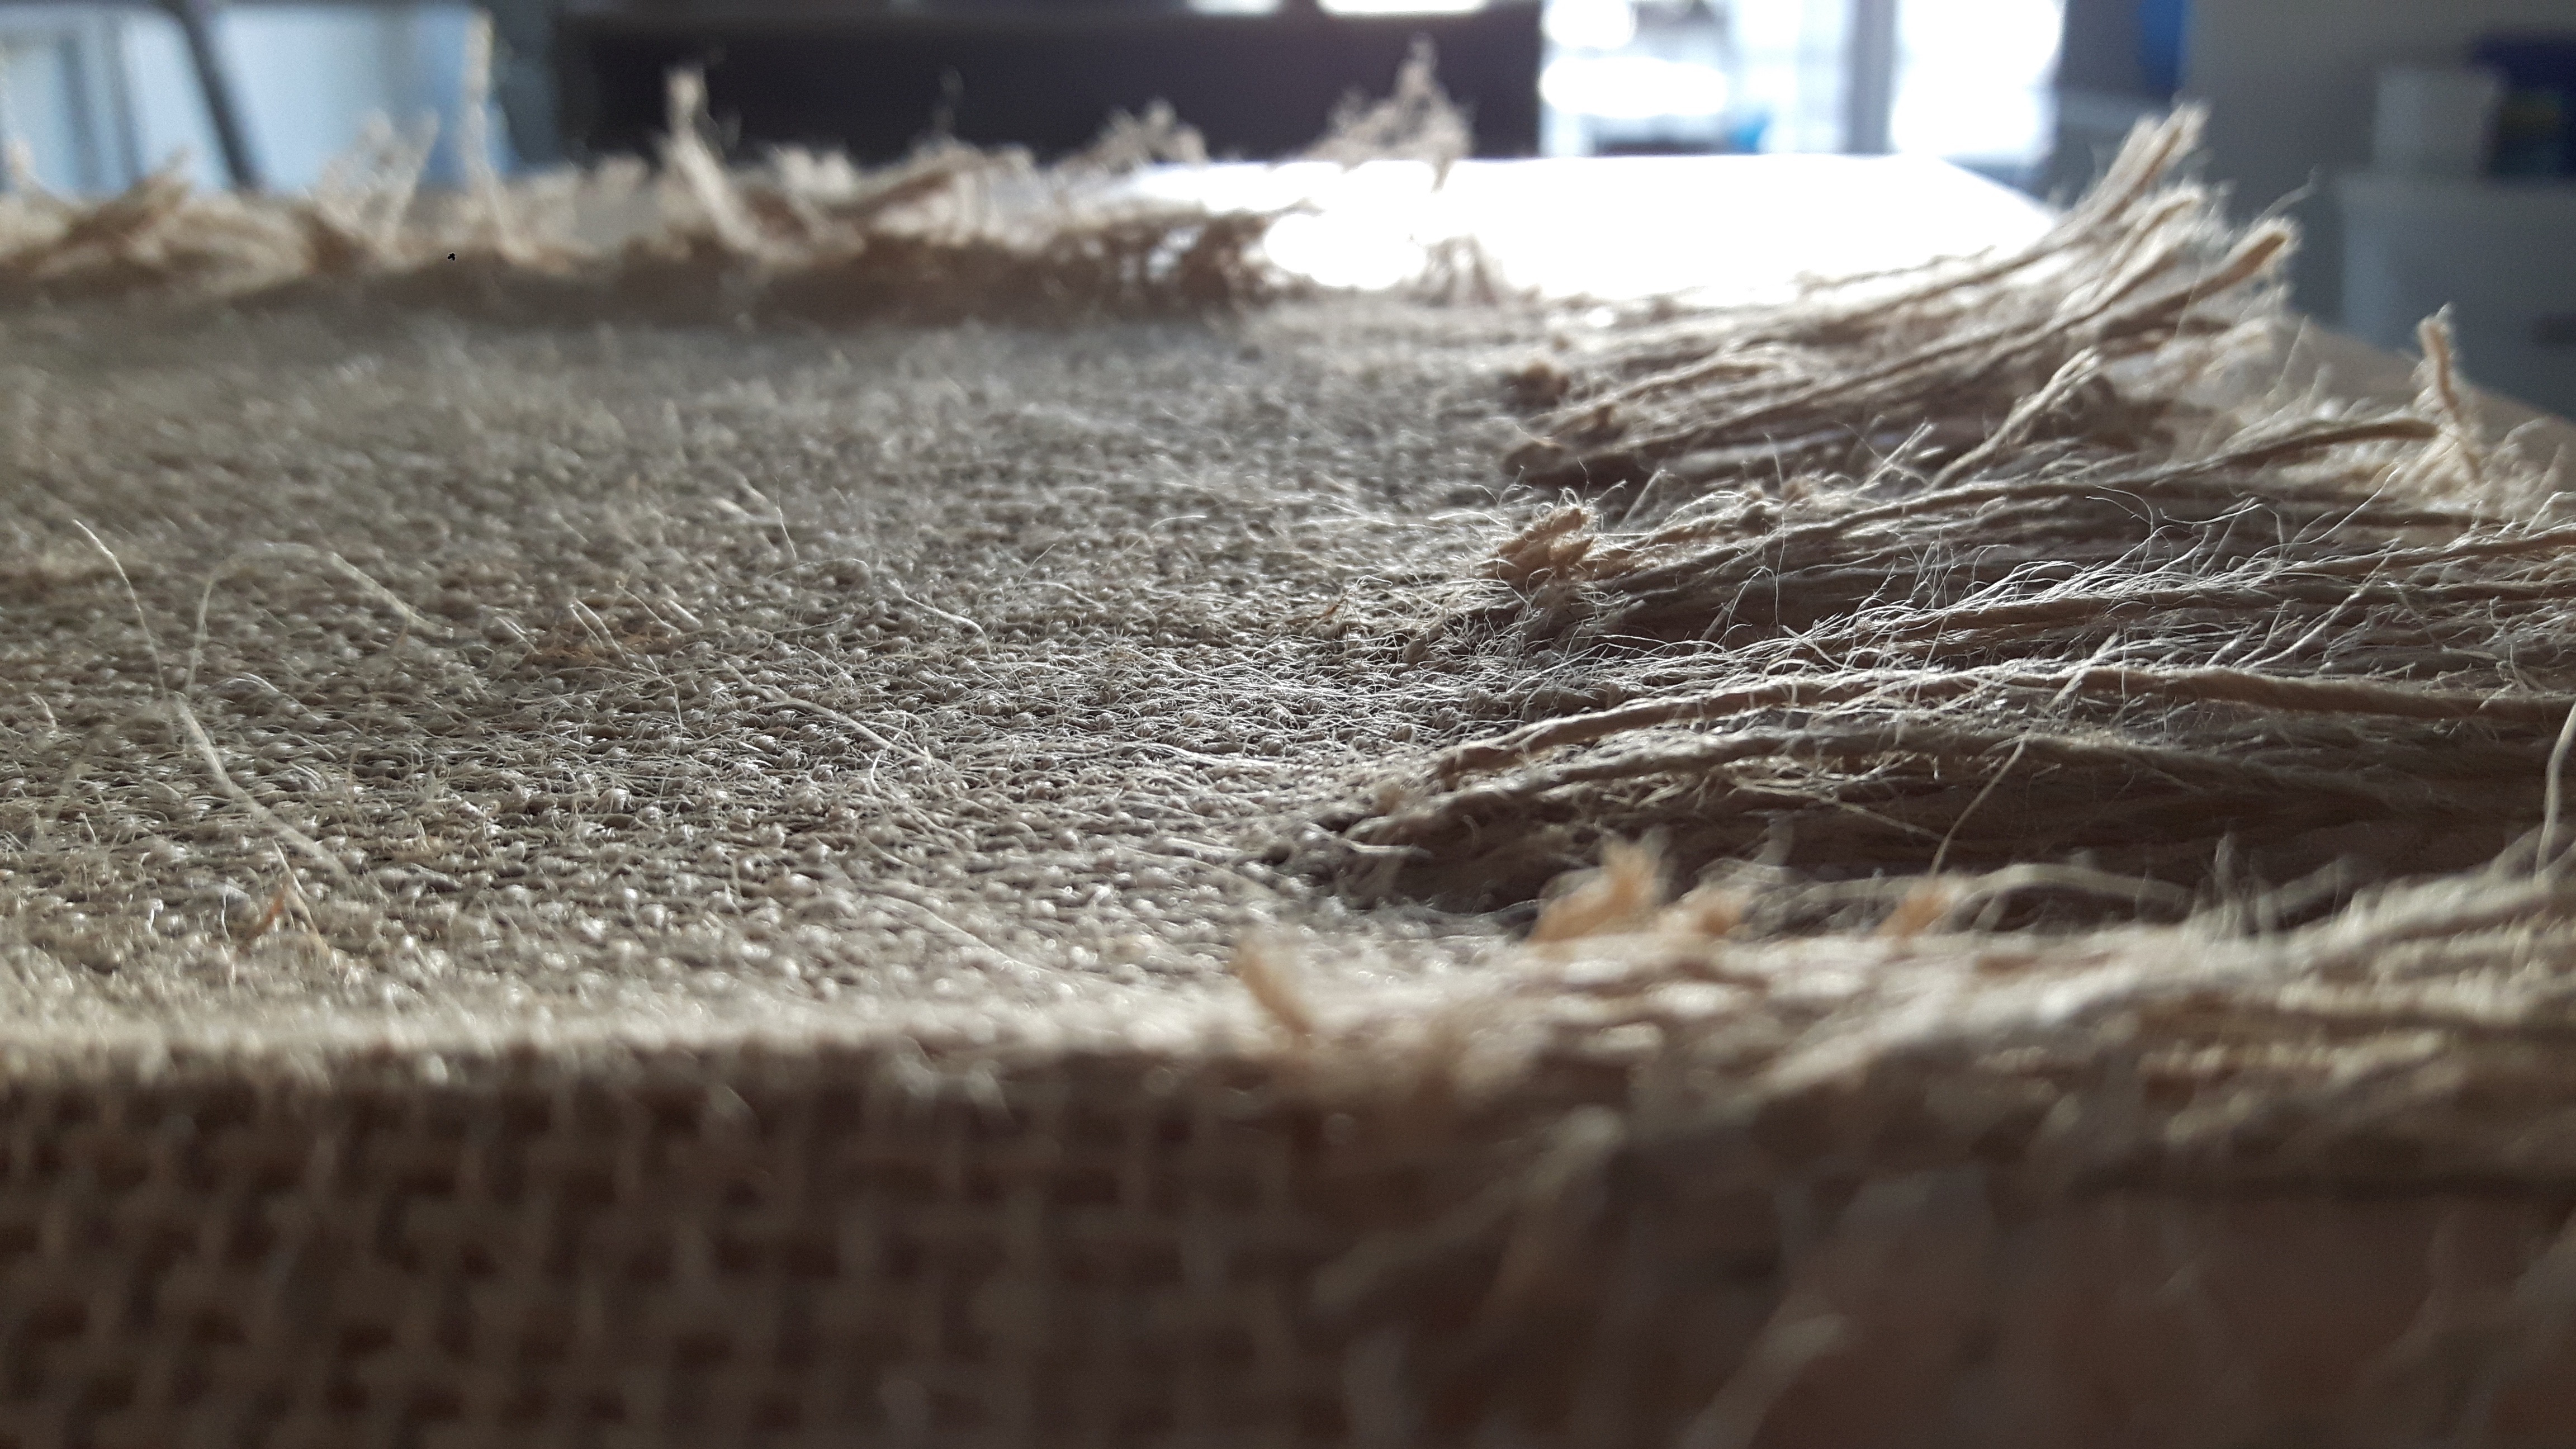
Talking only about the form and leaving the context behind, we could start analysing about the texture and properties of the fabric in itself. It is known to have a certain roughness and rawness to the touch and a very distinct smell. I am interested to play with this material which is very resistant, messy and difficult to manipulate. My curiosity is about how the material is going to react to certain interventions usually done when making a painting. In Figure 1 you can see the rough and raw texture of the jute canvas.
Building the structure
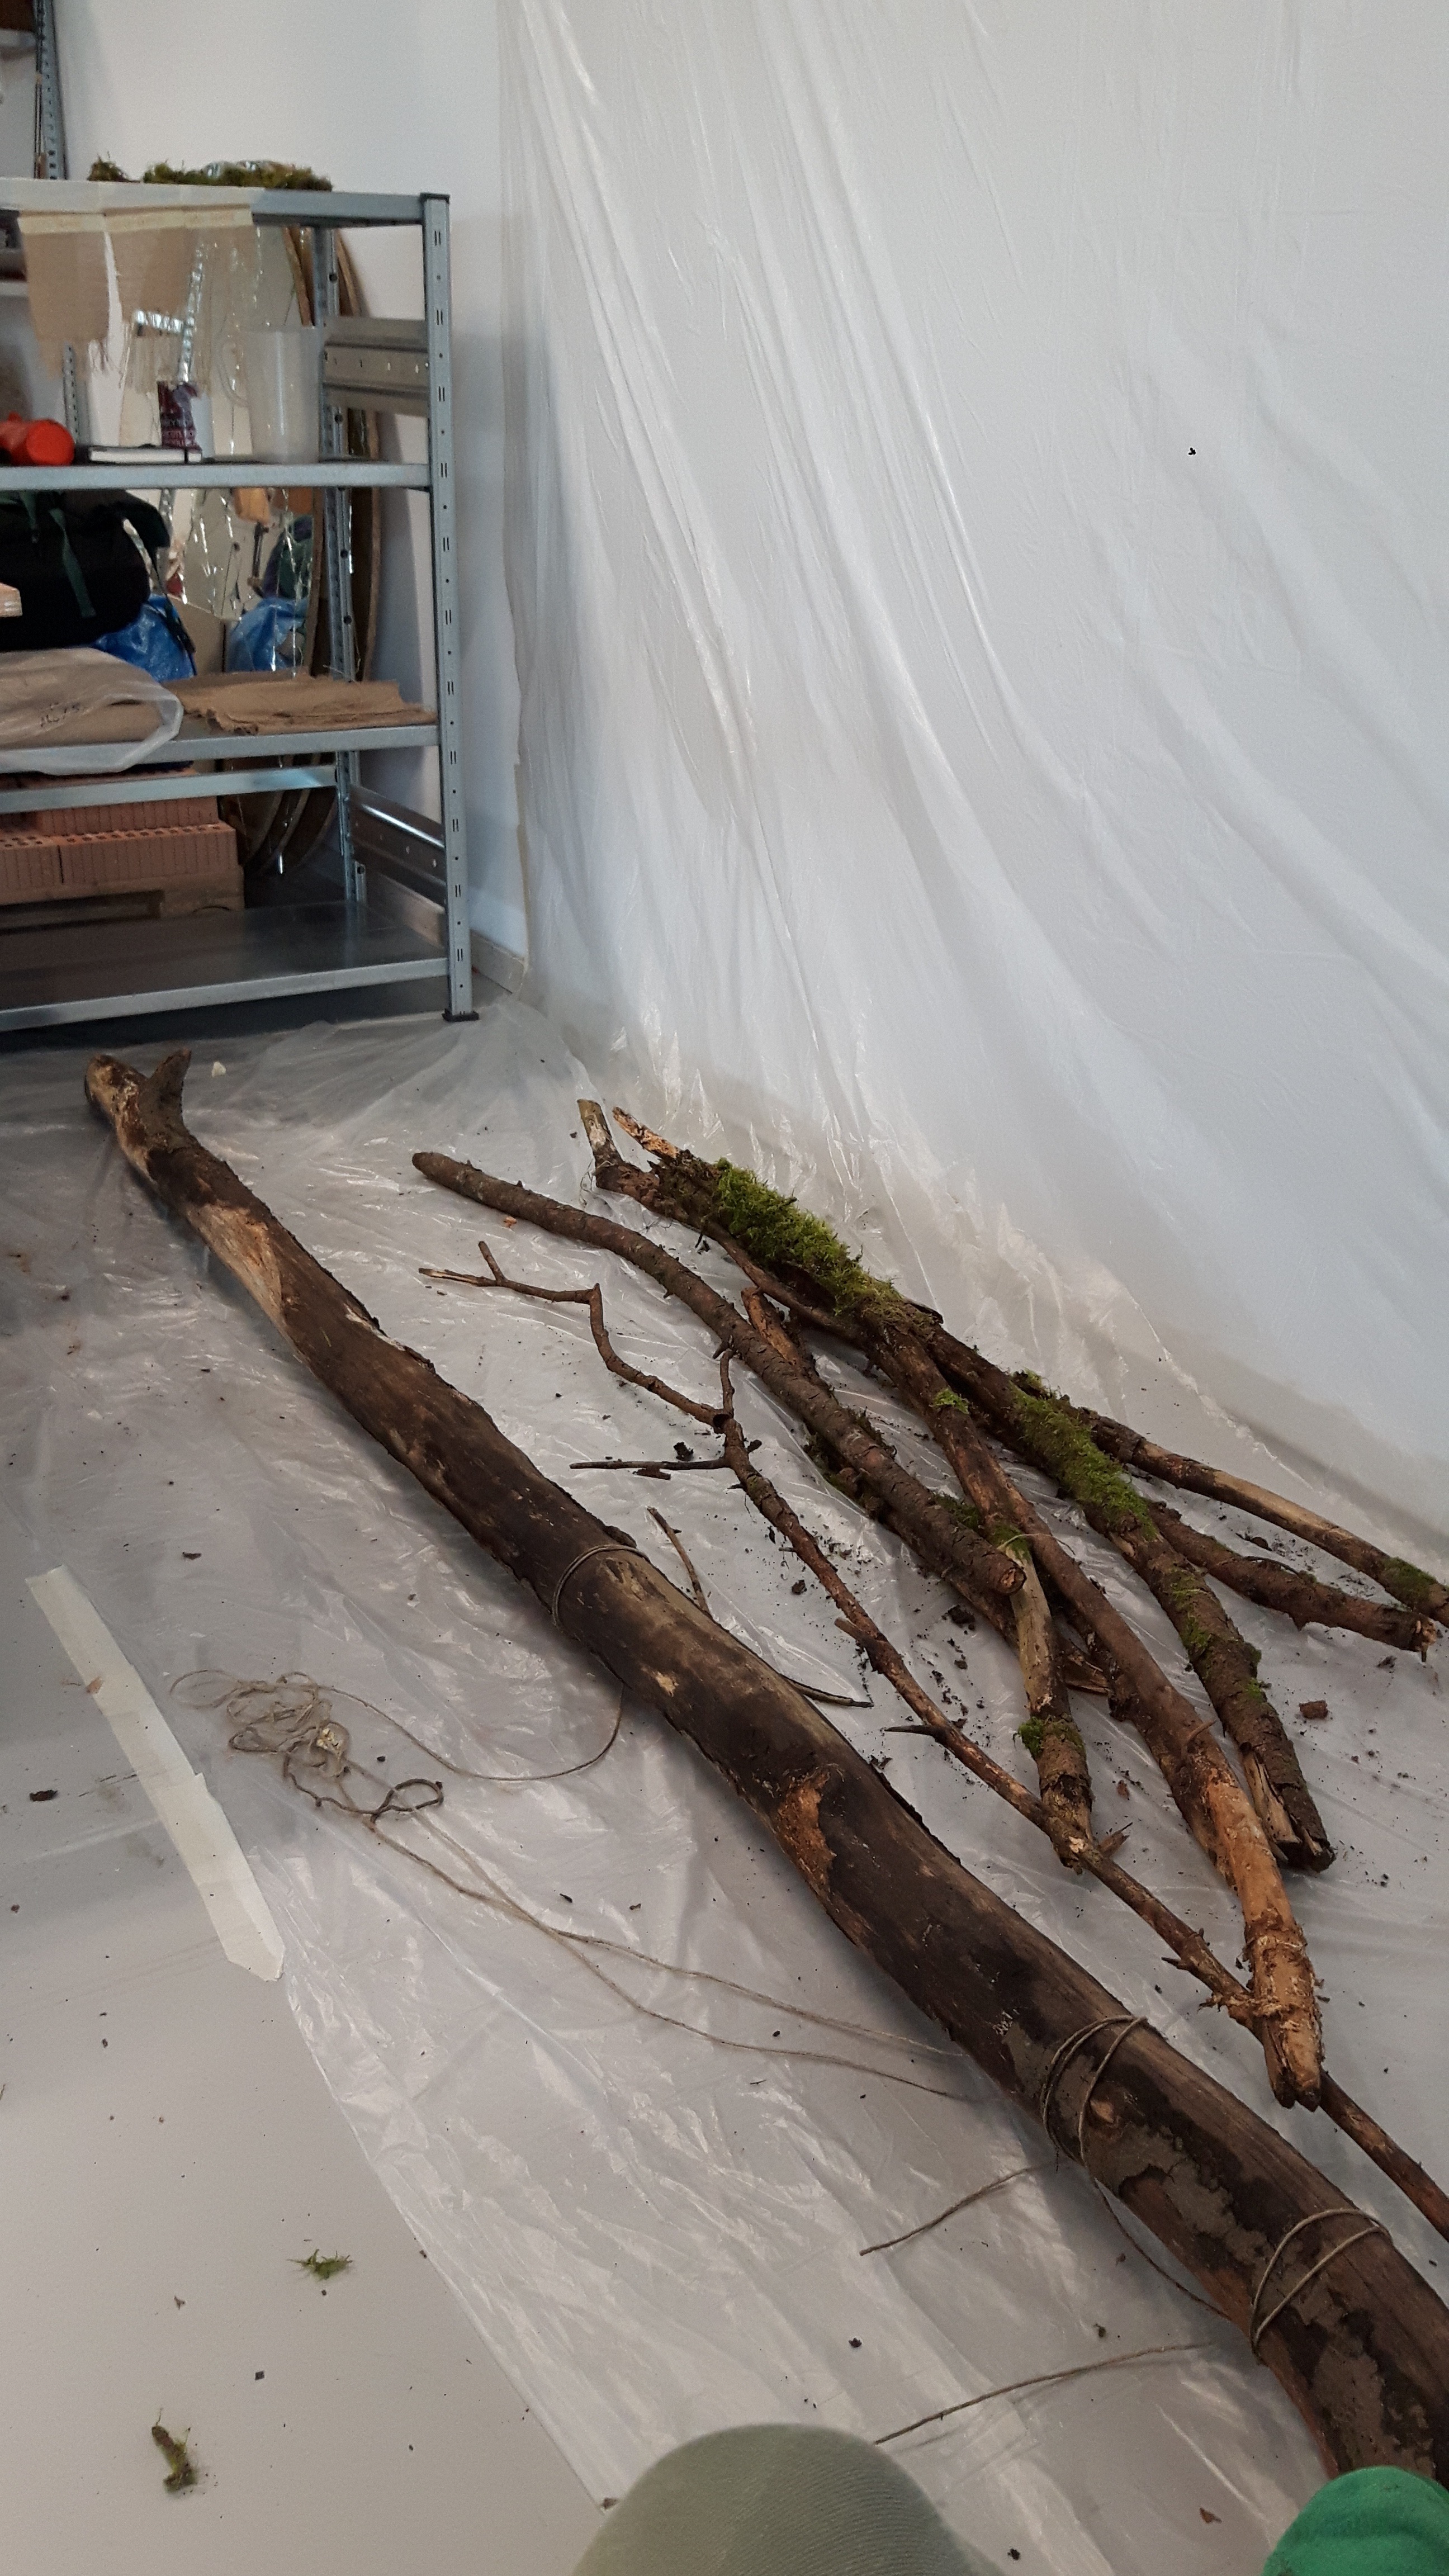
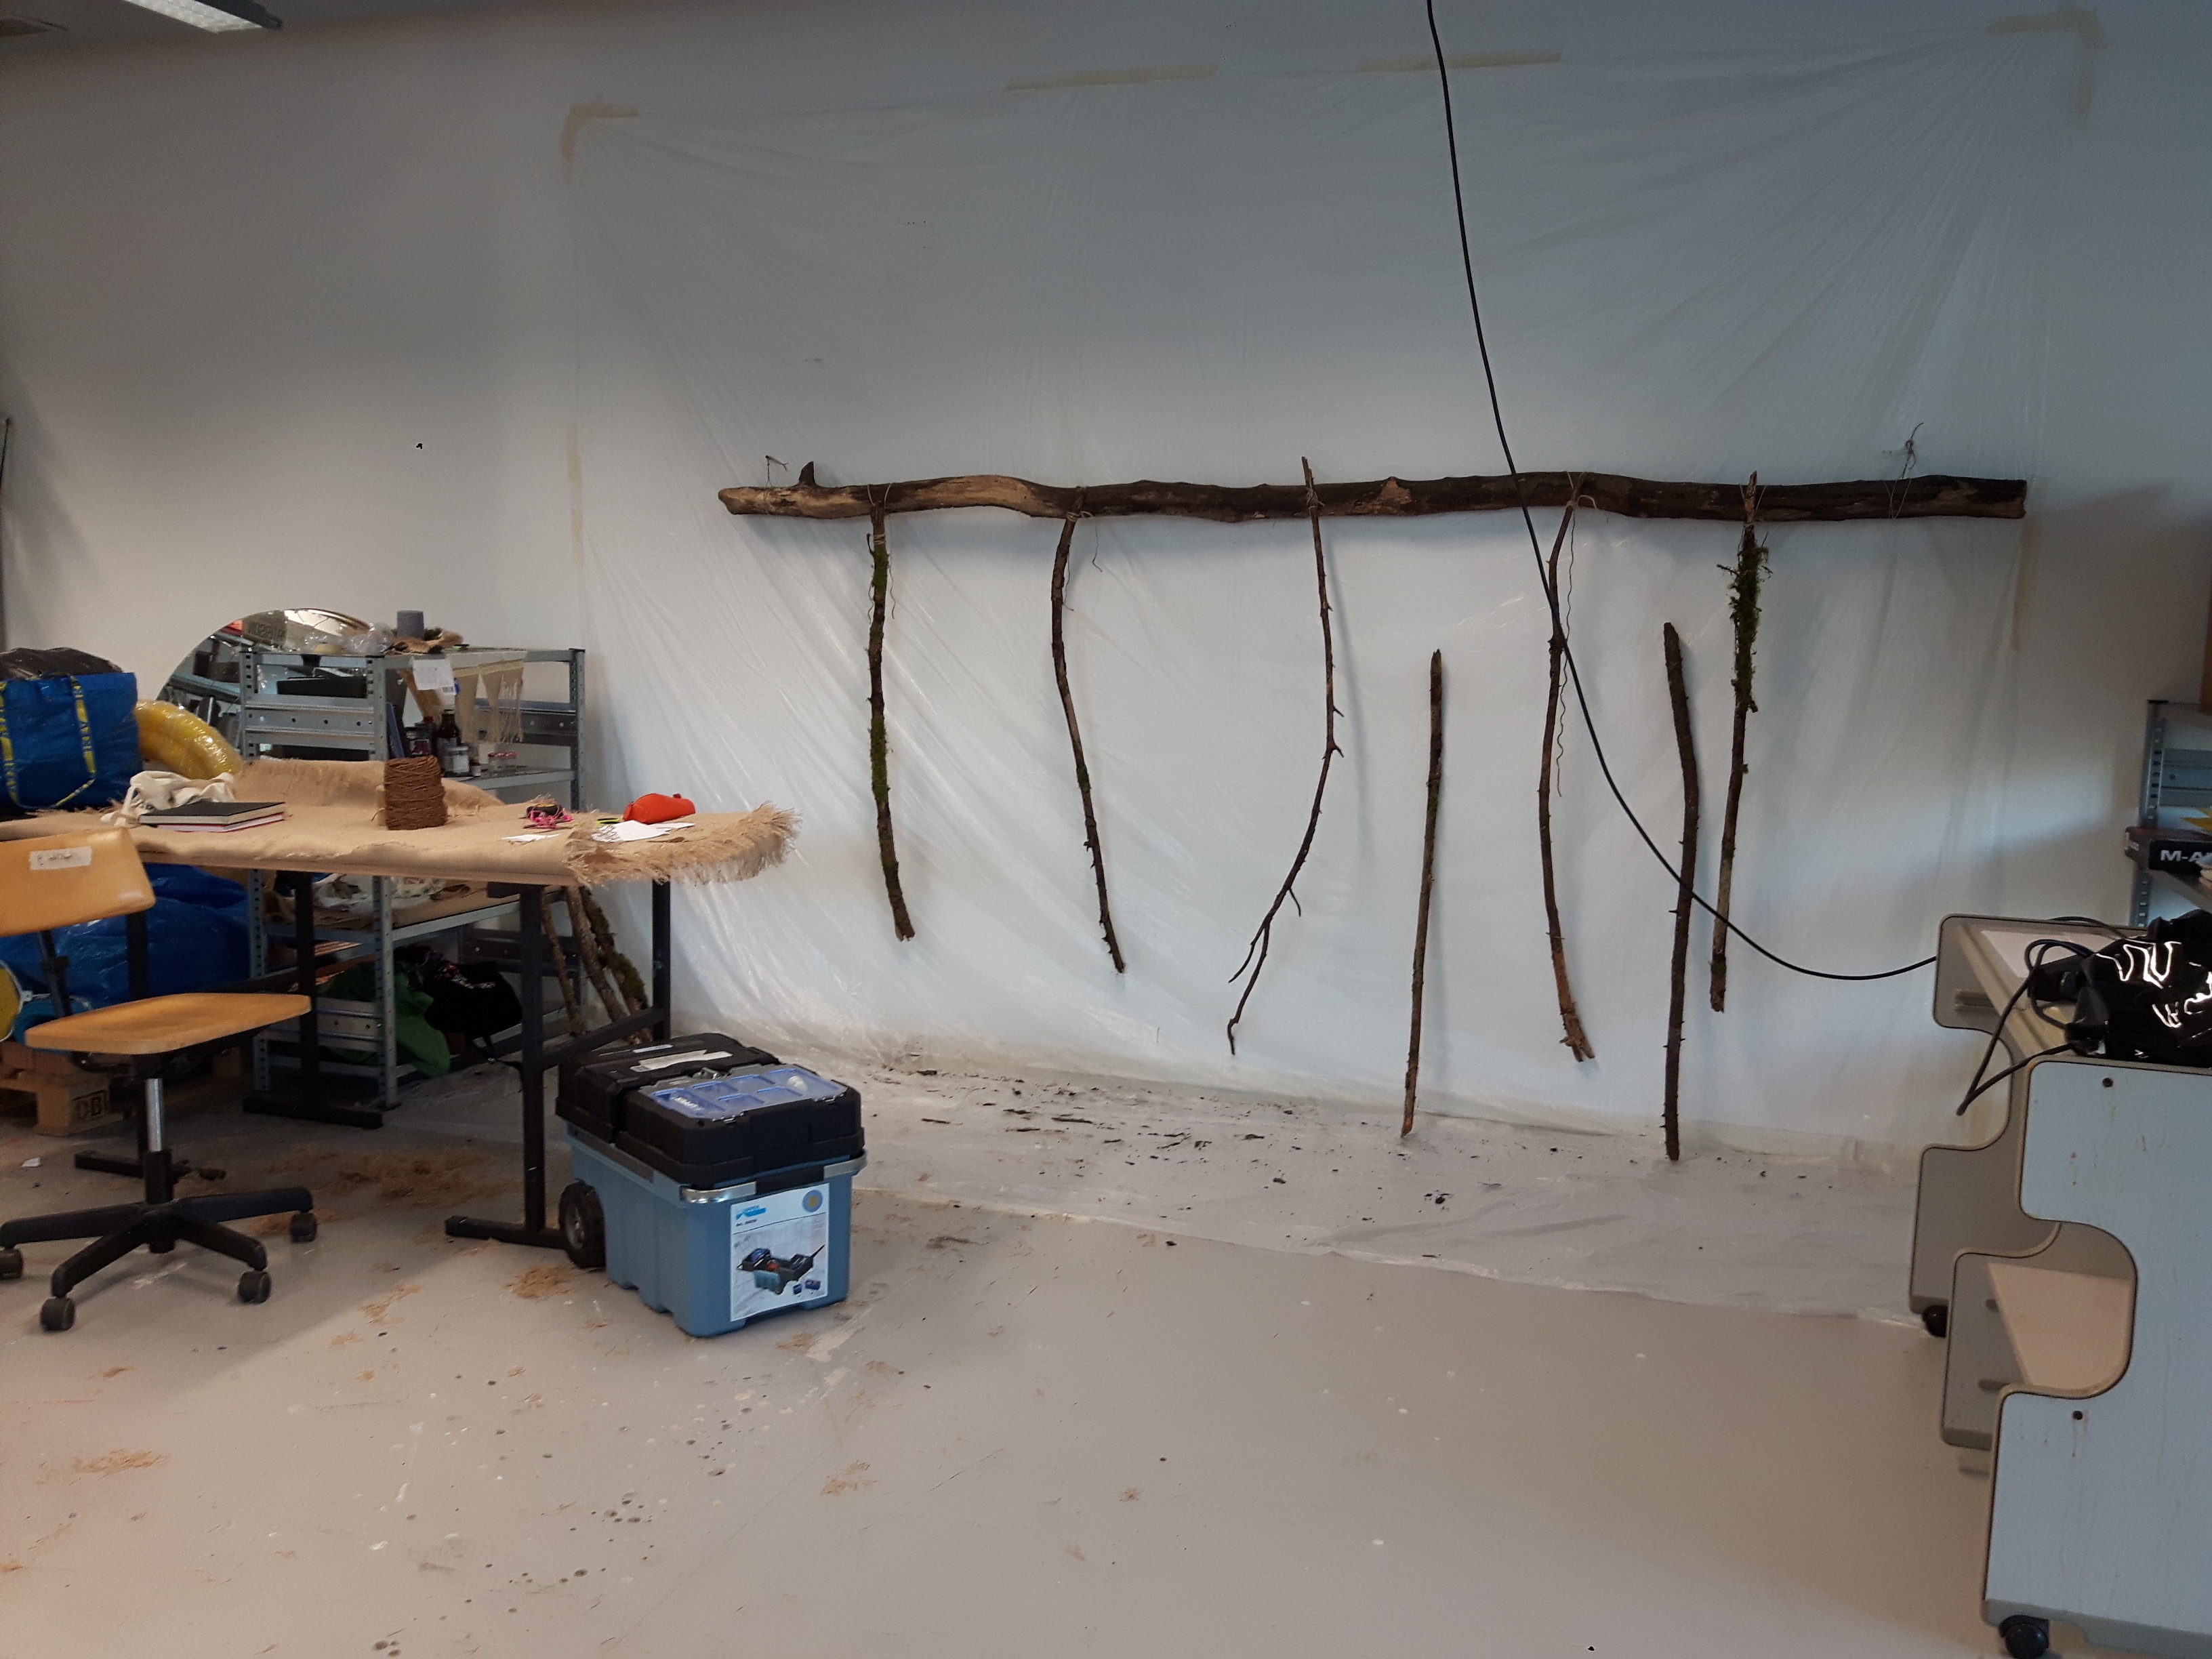
I travelled twice to the woods in Chäfferberg Zürich. In Figure 2, there are the wooden sticks brought to assemble the base of my piece. As you can see in Figure 3, the structure in itself is held together by a large 3 m long branch from which sticks of various shapes and sizes are hung. Bringing these items down the hill have cause muscle pain for the following days. These journeys were an act of endeavour, discovery and personal satisfaction.
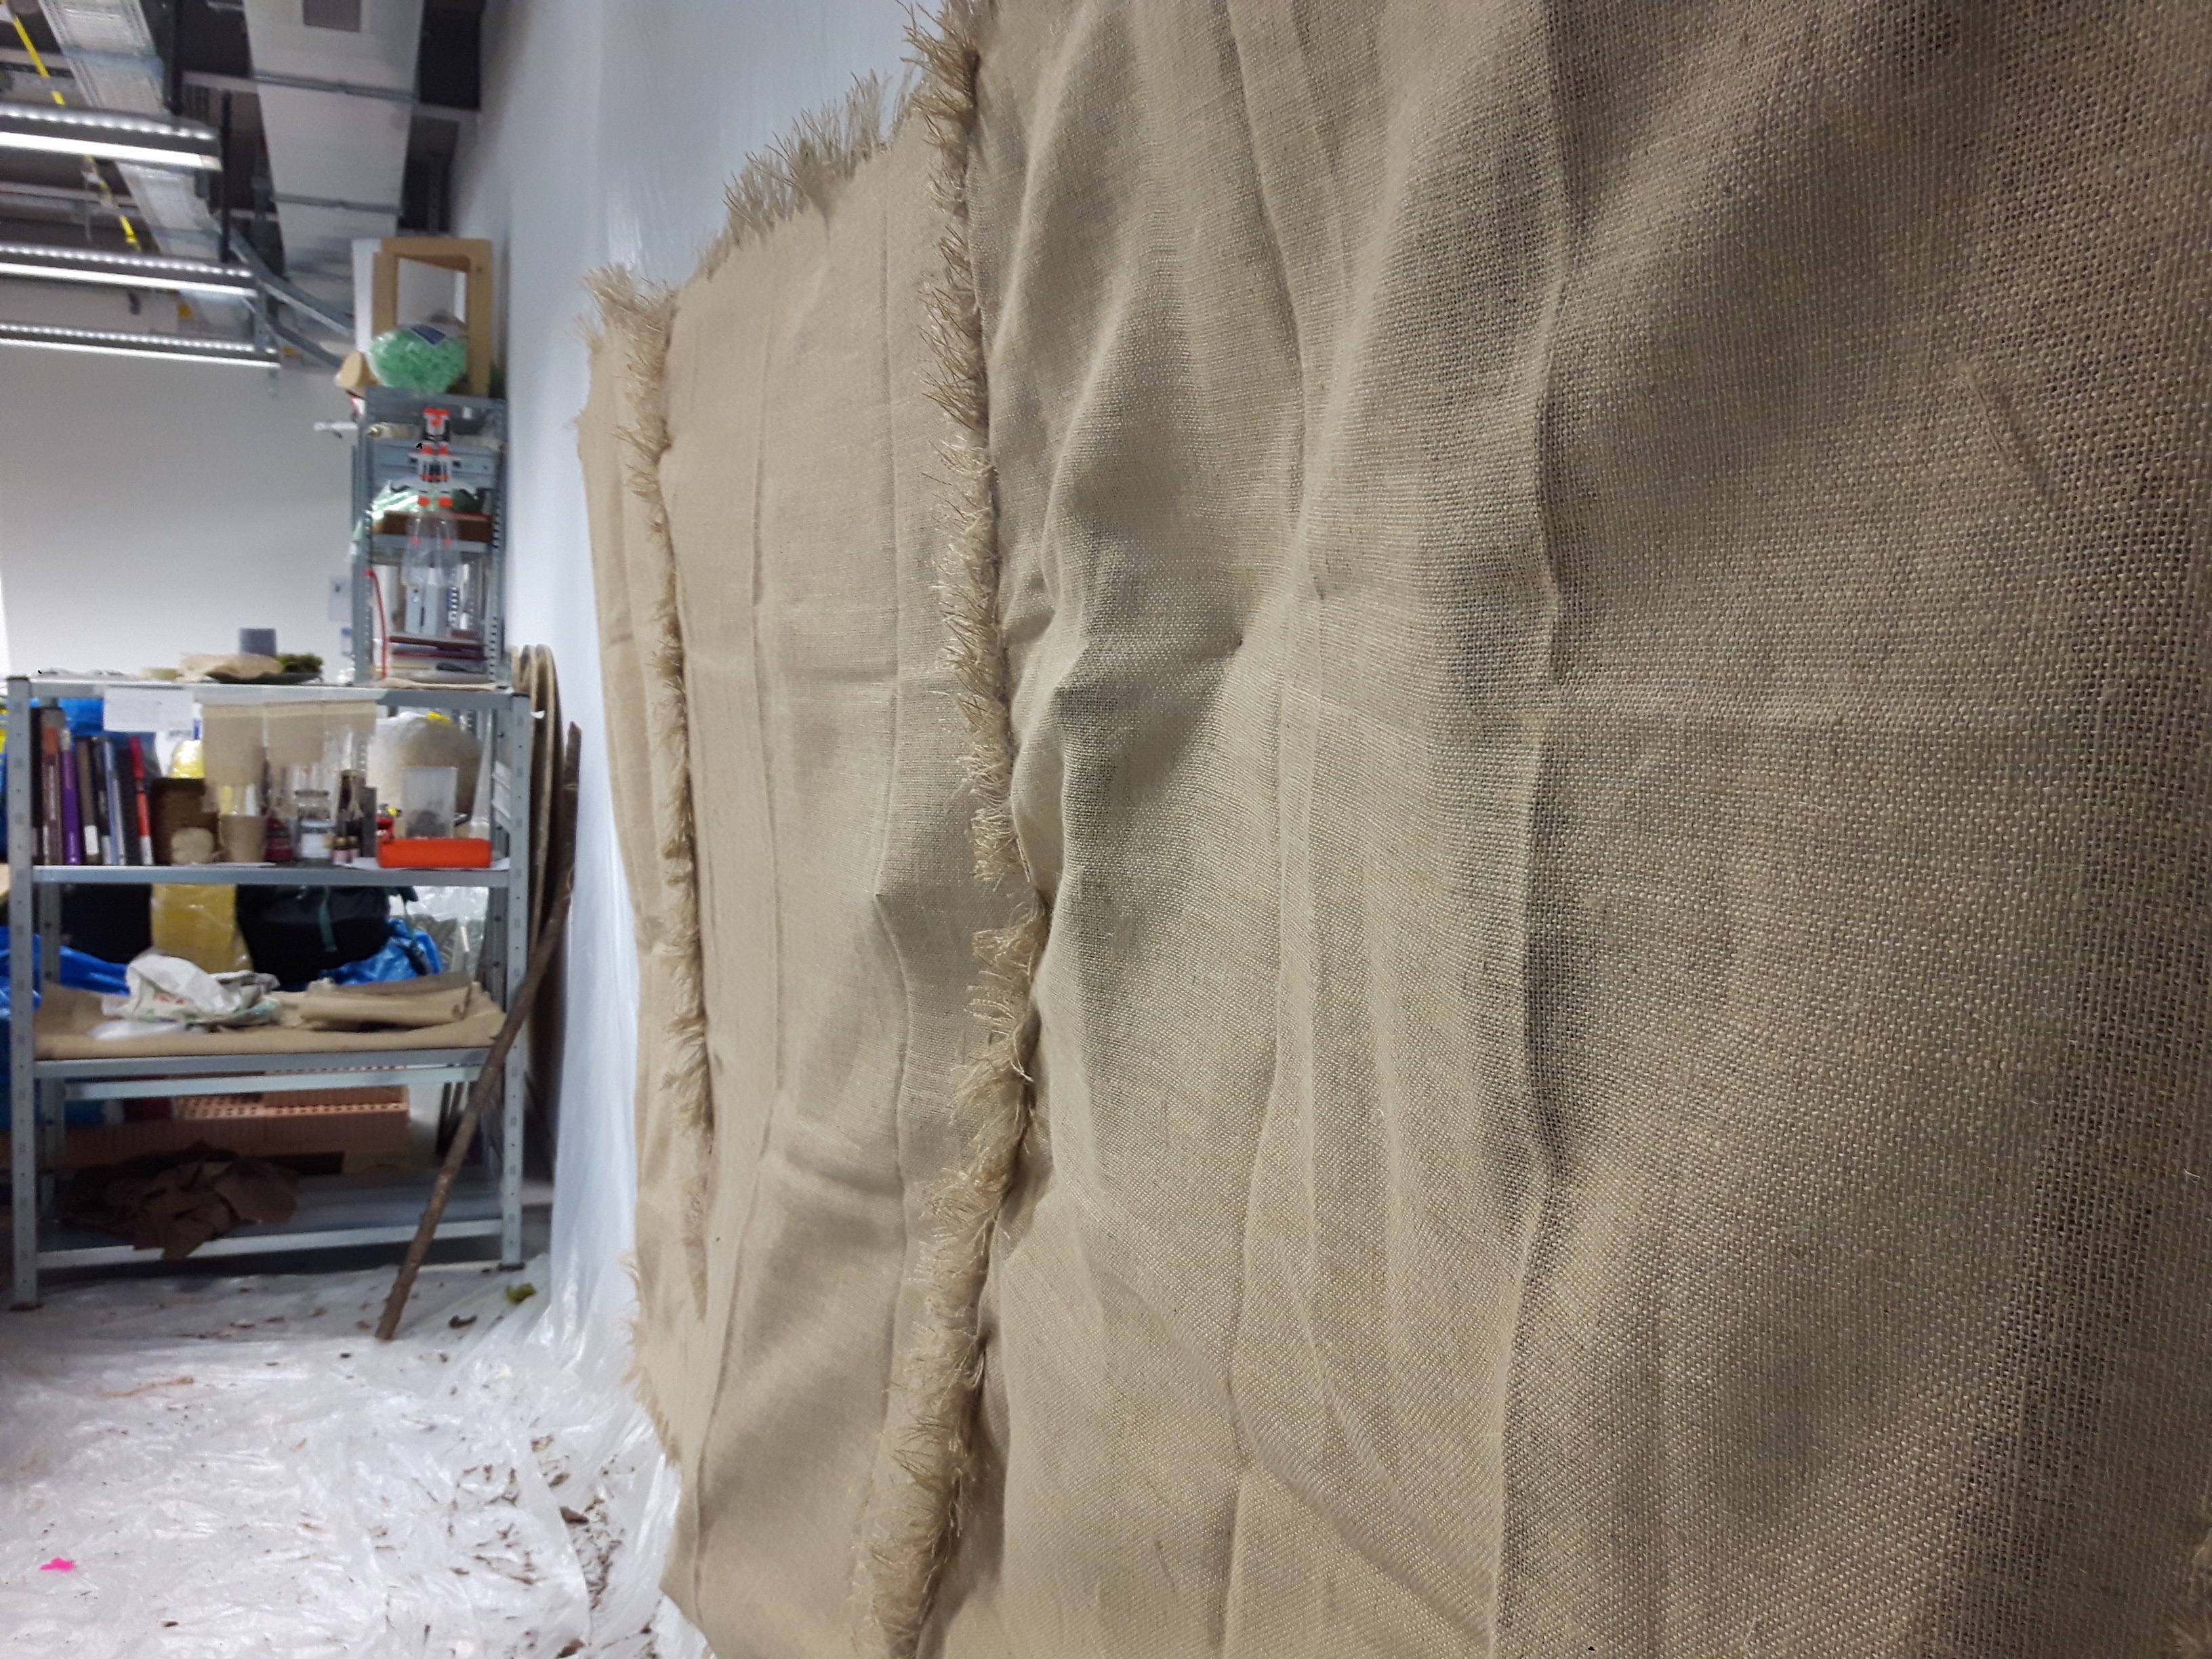
Once the structure was ready, I proceeded to position and semi- stretch the jute canvas onto it. The aim is make an unlinear support for my canvas in order to give a structure. As shown in Figure 4, the shape of the sticks should push against the canvas in a manner to form irregular shapes on the surface.
Preparing and sizing the surface
How to size your canvas
Sizing is the word used to prime a surface of paper or a canvas to change the absorption of the material. In other words, sizing makes a material “liquid proof”. When the paint is applied to the canvas, the stain will stay on the surface instead of entire through the fiber of the material.
The most conventional way to size a canvas is with the use of rabbit skin glue. It was formerly used as an ingredient in traditional gesso.
In some painting practices, such as making religious icons etc, rabbit skin glue can also be used as an adhesive to stick something onto a surface.
How to make rabbit skin glue
Ingredients
- water;
- rabbit skin glue granules;
Materials
- an electric melting pot for wax, or a melting pot liner on a stove;
- measuring cup;
- a wooden stick;
Recipe
Step 1
Depending on the proprieties of the fabric or paper you wish to size the recipe varies. In the case of using paper or a thin canvas, it is advised to measure 1: 15. Pour 750 ml of water in your measuring cup and top up until 800 ml of the rabbit skin glue granules. When the fiber of the surface is more absorbent than it would be wiser to measure 1 : 10. Pour 500 ml of water in your measuring cup and top up until 550 (50 gr) of rabbit skin glue granules. Then make sure all the granules sit on the bottom on the measuring cup. If not, poke them down with the stick.
Step 2
Let it the granules soak until it looks like a gelatine. Depending on the size of the granules the time of waiting varies. Small grinder granules take about 3 hours to fully soak. Bigger granules need to sit over night or a day depending on when you prepare the recipe.
Step 3
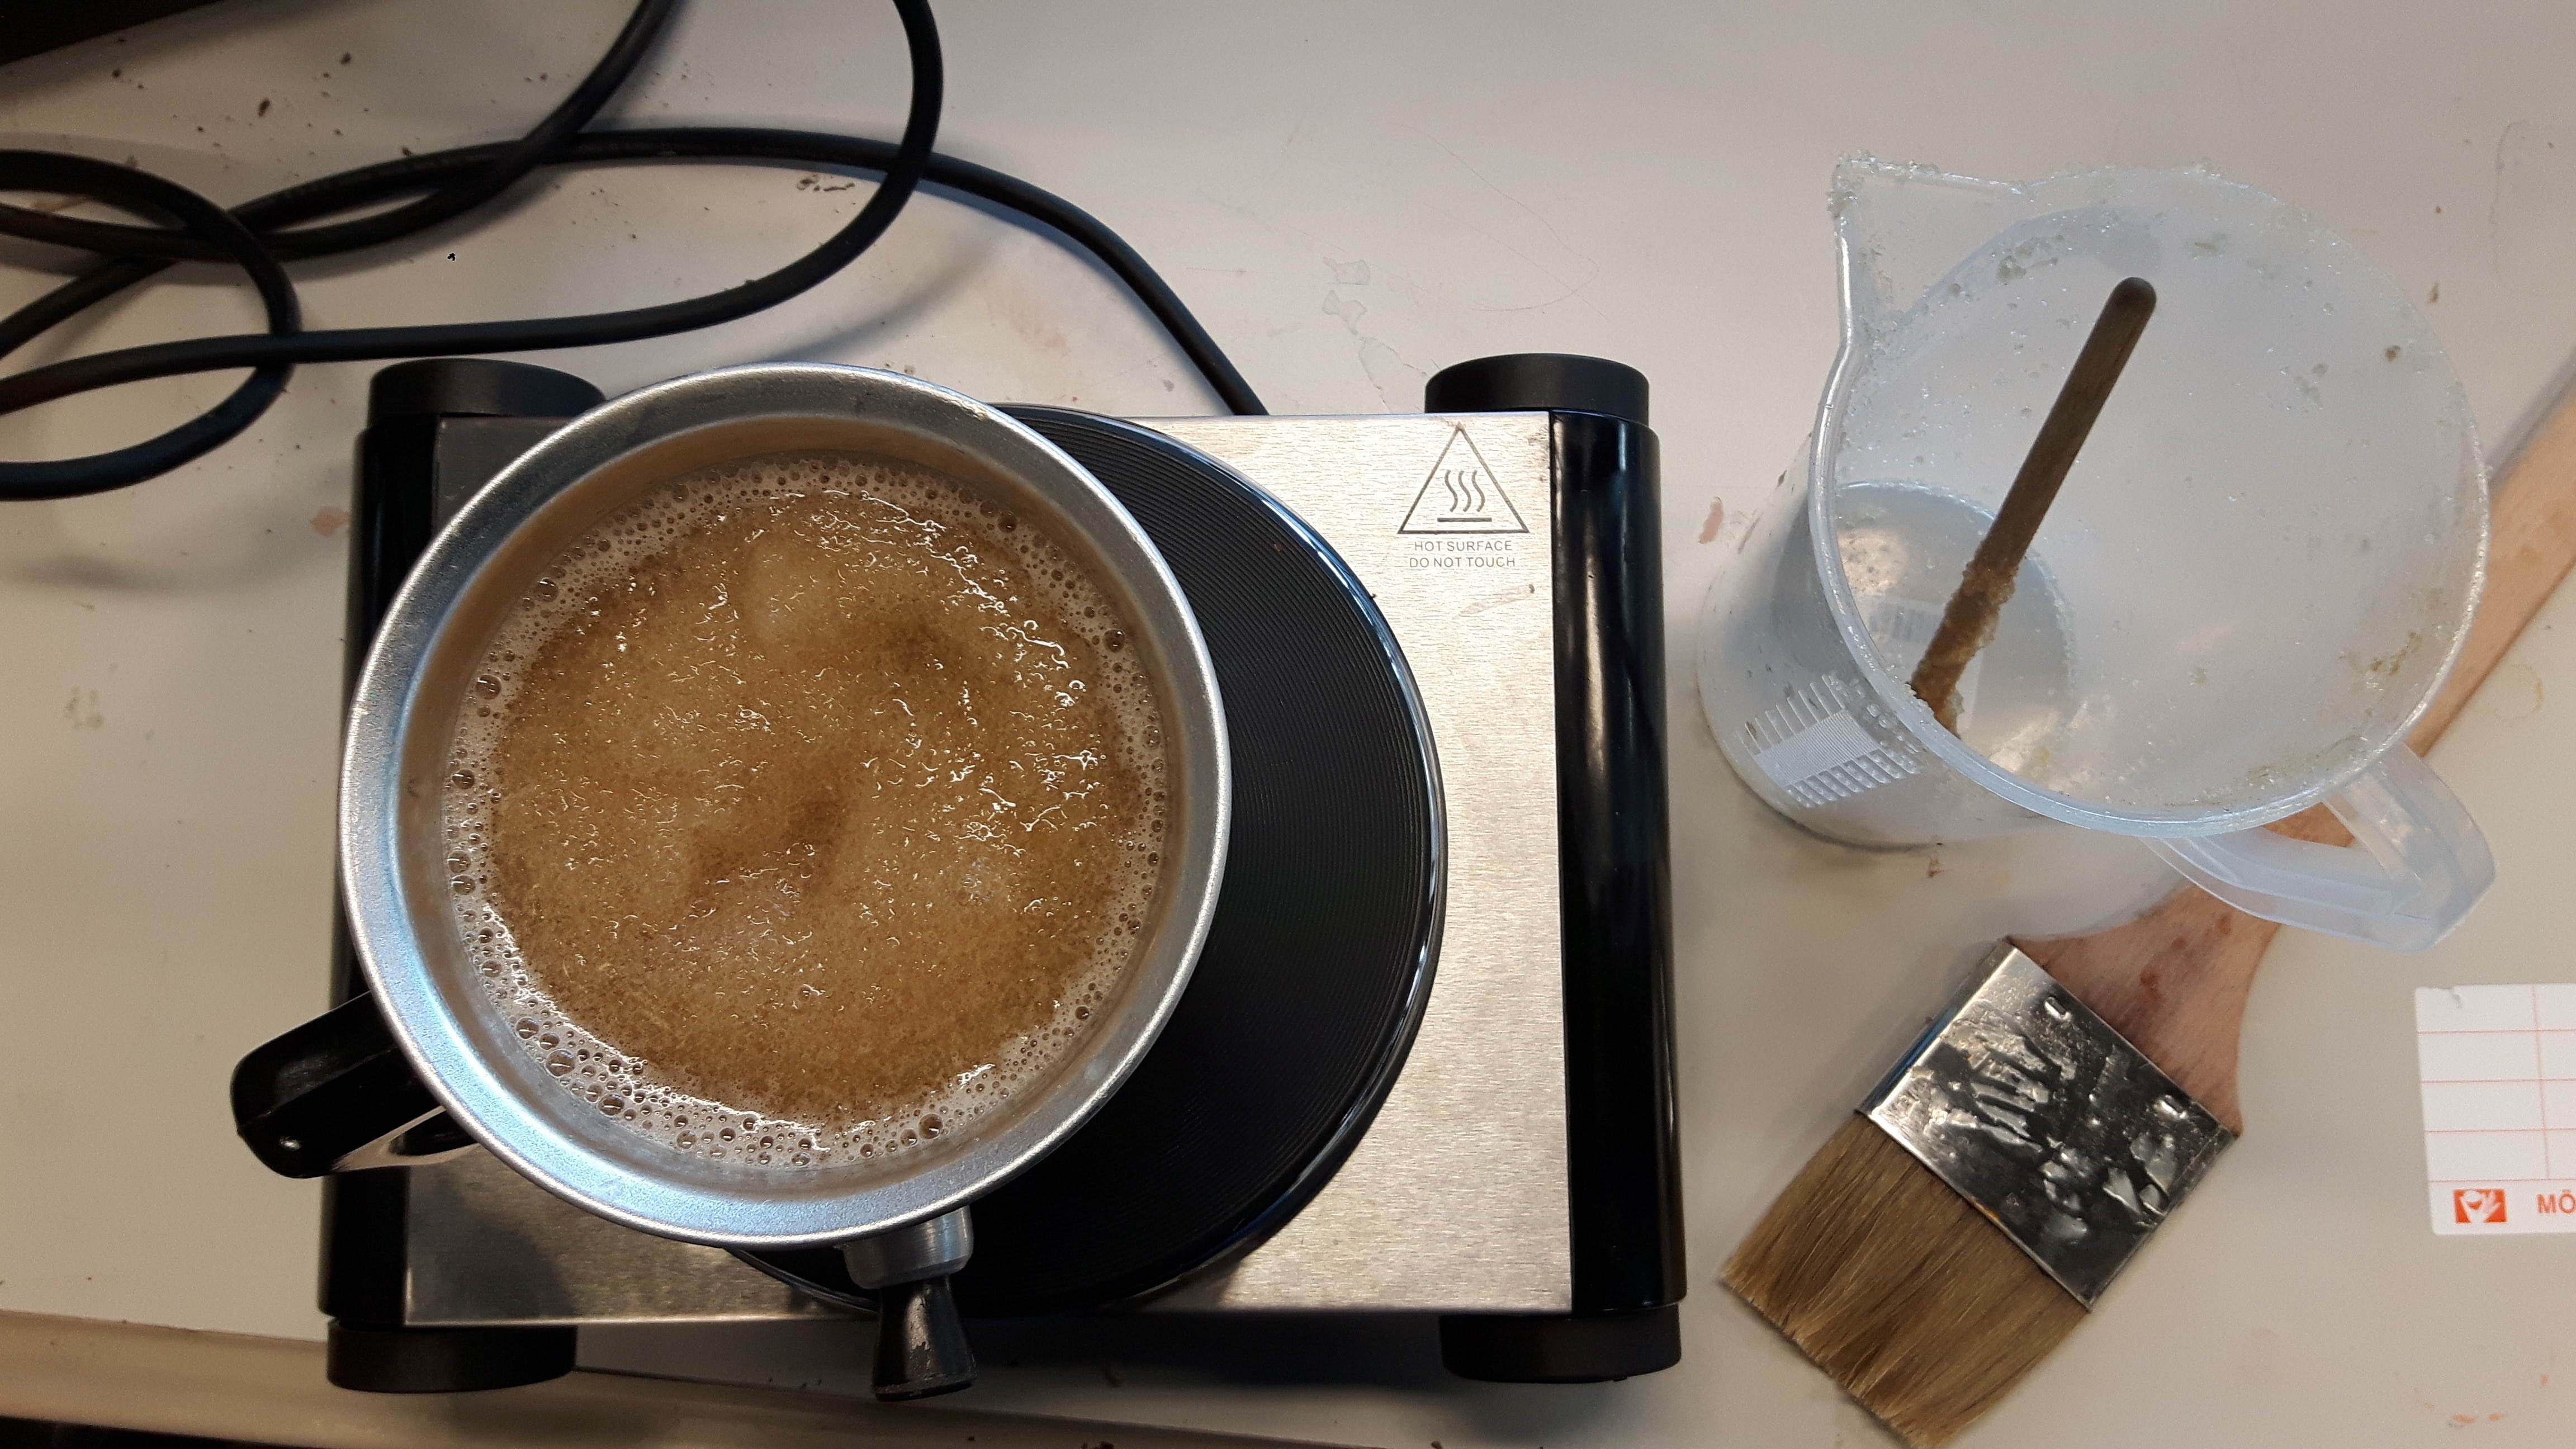
When the granules have soaked in it is time to make it into liquid glue. Pour the recipe into a melting pot and heat it up on the stove, as it's shown in Figure 5. During the melting process make sure to stir the mixture once in a while. The temperature cannot surpass 60°. If the glue starts to boil, it looses it’s efficiency. Once the glue is melted transfer it into a bowl or the measuring cup and you can use it to size your surface.
Jute reacting to the glue
Since the jute already has a particular smell when the glue was applied onto the surface it caused some sort reaction that infested the noses of my atelier peers. The first coat of rabbit skin glue was completed in 3 parts because as said before the jute fiber absorbs the liquids quickly. Talking in consideration this factor when preparing the rabbit skin glue mixture to size the surface I put more granules in the water than usual. Once the first full covered coat was applied, the glue spread effortlessly onto the surface with the following layers. Hence I could initiate a dripping pattern onto the base by diluting the glue with more water. (Image are yet to come)
Comments
Dominique@Elena: Perfect project description. Thank you. I am looking forward to seeing the material and technical results. Concerning all the related topics that you have mentioned above … have you narrowed your topic down yet. What did you think about Singer's text?
Bibliography
Sanyal, T (2017) Jute Geotextiles and their applications in civil engineering, Springer.

